This will restore an entire project as a new one. Alternatively you can restore one or more bins to a current project.
If the project has been deleted, see restore a deleted project. Or if the drive the project was on has been deleted, see restore a project from a deleted drive.
As you complete each step you will see a summary of the decisions you have made. You can click Cancel at most steps to go back and adjust your decisions.
1. Select the project to restore
You first need to select the project which you want to restore.
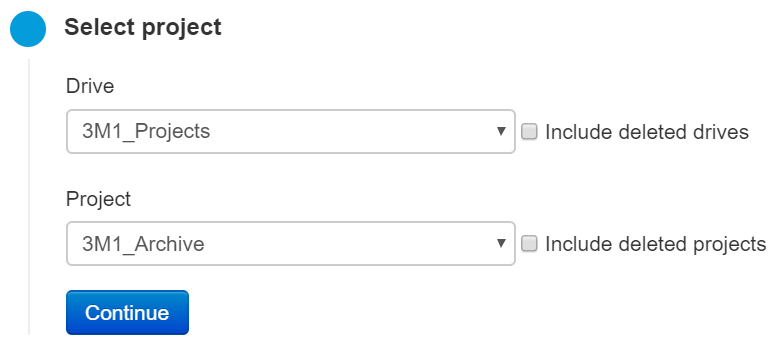
From DIVA Fusion’s System menu, click Restore Backup.
Select the Drive where the project is stored.
Select the Project to restore.
Click Continue
2. Select the version to restore
Now you choose at what point in time you want to restore the project from.
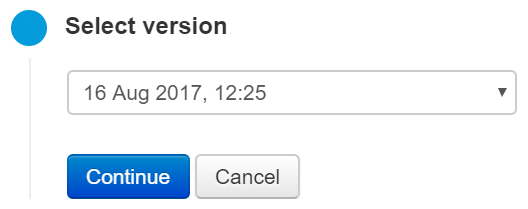
From the dropdown, choose the backup version to restore.
Click Continue.
3. Select the restore type
Now specify that you want to restore the entire project.
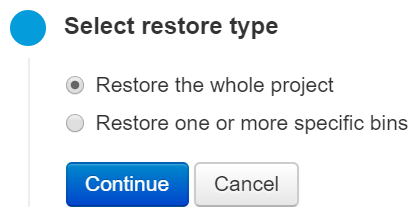
Select Restore the whole project.
Click Continue.
4. Rename the project
If the drive you are restoring the project to already has a project of the same name, you’ll be prompted to give the project you are restoring a new name.
If there is no naming conflict, you will not see this step, and you can skip straight to step 5.
By default RESTORE is appended to the project name.

Type a new name for the project you are restoring.
Click Continue.
If that project name is already in use on the drive you will be prompted to change it again. Repeat step 4.1.
5. Share the project
You can choose to either share the project with all users on the restore drive, or keep it private and restore it to just one user.
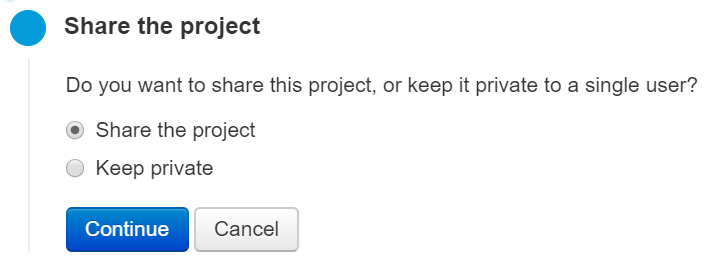
To give all users access to the project, select Share the project.
To give just one user access to the project, select Keep private.
Click Continue.
If you decided to share the project, continue with step 6 below.
If you decided to keep the project private, continue to step 8.
6. Move bins to unprotected or users
You can choose to move every bin into unprotected, or allocate them to specific users based on what user had the bin before.
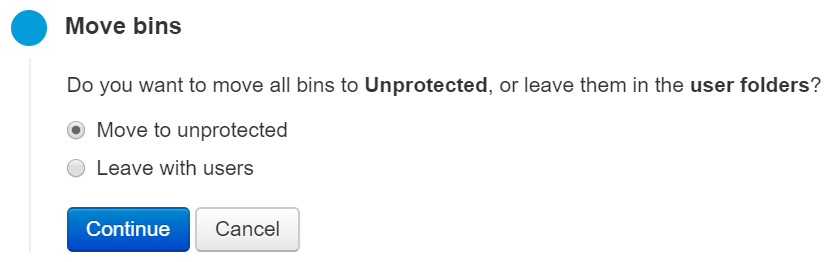
When moving all the bins to unprotected, they are restored to either a private or shared subfolder based on where they were before, and then in a folder of the original bin owners name. Any original subfolder structure is also applied.
When moving the bins to specific users, shared bins are placed in the new owners shared folder, and private bins are placed in a private sub-folder which is created in the new users folder.
To move all bins into unprotected, select Move to unprotected.
Or to move bins to specific users, select Leave with users.
Click Continue.
If you are moving all the bins to unprotected, skip to step 9.
If you are leaving the bins with users, continue with step 7 below.
7. Reassign bins to users
If some of the original users who had access to the project no longer exist, or don’t have access to the drive where the project is being restored, you will be prompted to reassign the bins.
If you do not see the Reassign bins step, skip to step 9.
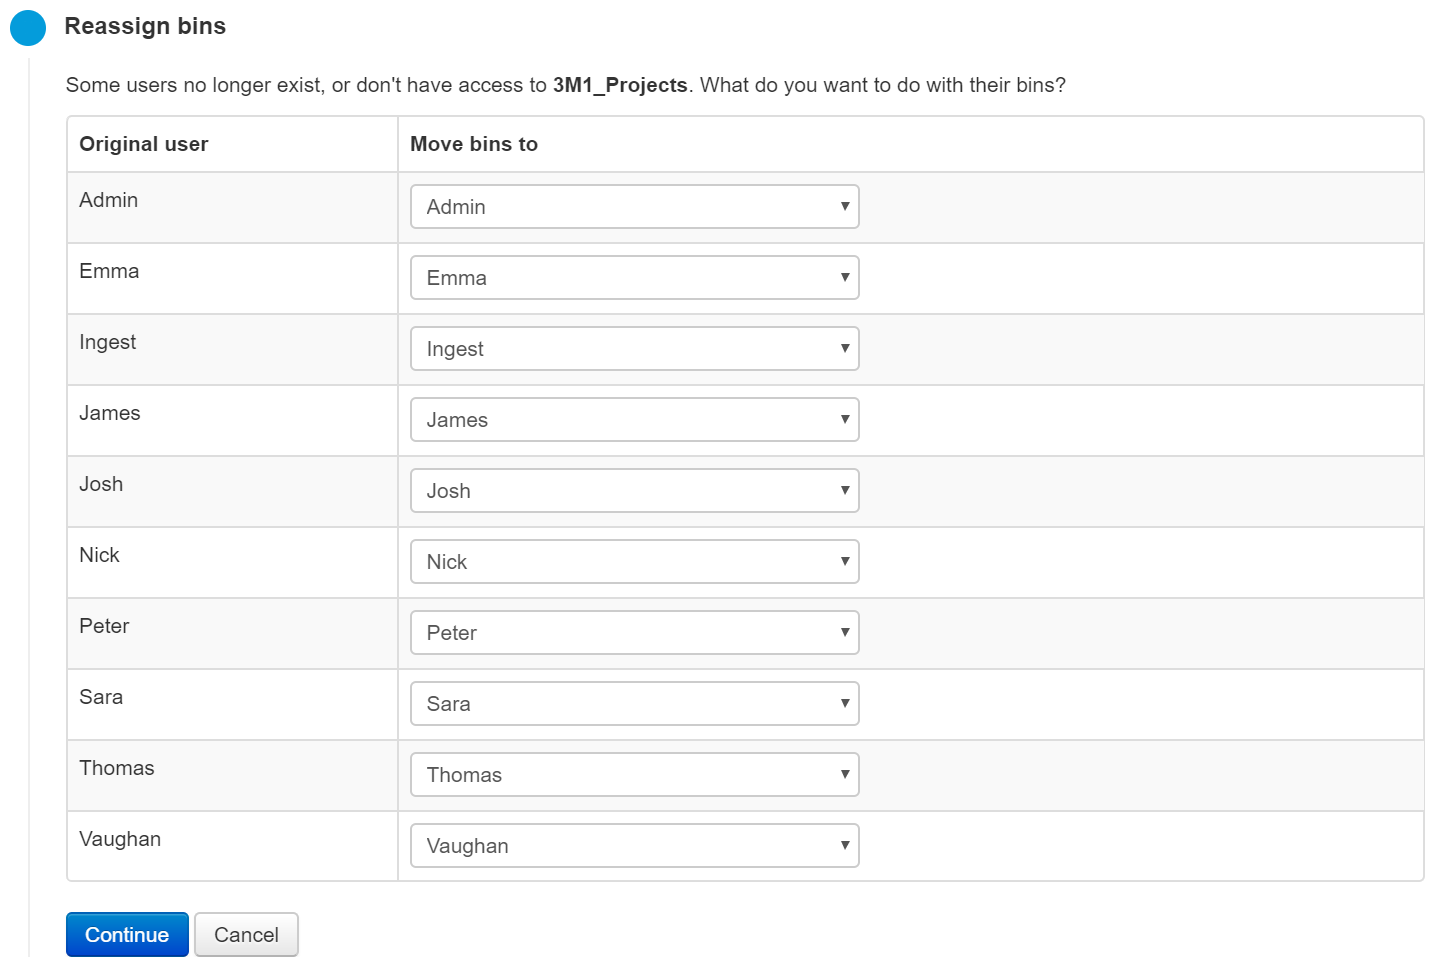
You are presented with a table of the original users who had access to the project.
For each original user, set what current user you want to assign their bins to. You can also choose to move a specific users bins to unprotected.
Click Continue.
Continue on to step 9.
8. Select the private user
If you are restoring the project privately to a user you need choose a user.
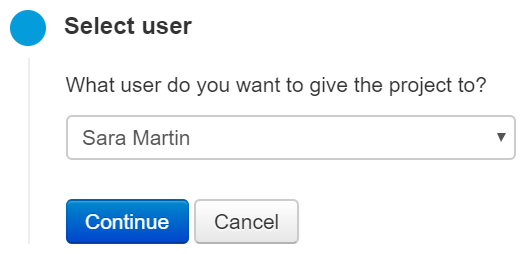
From the dropdown select the user to restore the project to.
Click Continue.
Tip You can share the project later like any normal project.
Continue to step 9 below.
9. Start the restore
Check over all the restore settings you have choosen.
If you are happy with the decisions, click Start Restore. You will then see confirmation that your restore job has been scheduled.
Or you can click Cancel to work your way back through the steps to change any of your decisions.