You can restore individual bins back into an exisiting project.
As you complete each step you will see a summary of the decisions you have made. You can click Cancel at most steps to go back and adjust your decisions.
1. Select the project to restore
You first need to select the project which you want to restore.
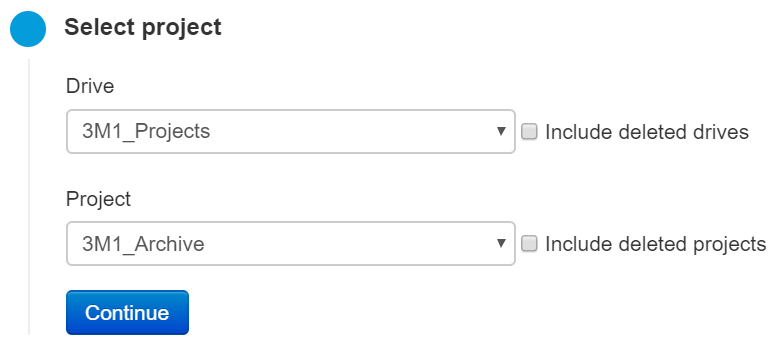
From DIVA Fusion’s System menu, click Restore Backup.
Select the Drive where the project is stored.
Select the Project to restore.
Click Continue
2. Select the version to restore
Now you choose at what point in time you want to restore the project from.
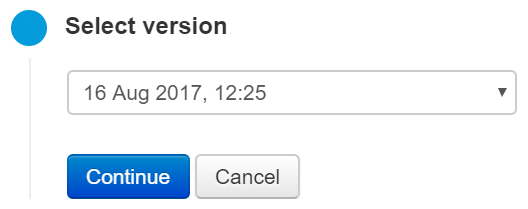
From the dropdown, choose the backup version to restore.
Click Continue.
3. Select the restore type
Now specify that you want to restore the entire project.
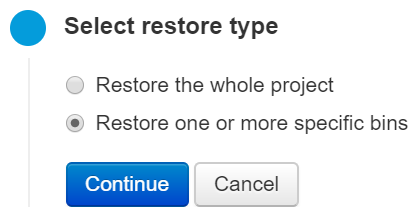
Select Restore one or more specific bins.
Click Continue.
4. Select the files to restore
You can now view a tree of the files as they existed for the project as of the version you previously selected.
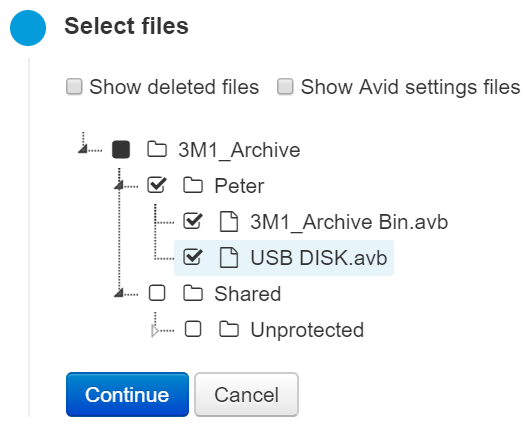
If the file you want to restore was deleted, check Show deleted files.
Expand the tree to find the files you want to restore.
Check the files you want to restore.
Click Continue.
You can check entire folders to restore all files within it.
The Avid project and settings (avp, avs, xml) files are also backed up. If you need to restore these, check Show Avid settings files to find them.
5. Start the restore
Check over all the restore settings you have choosen.
If you are happy with the decisions, click Start Restore. You will then see confirmation that your restore job has been scheduled.
Or you can click Cancel to work your way back through the steps to change any of your decisions.