With DIVA Fusion, you can add a set of new drives consisting of all three DIVA drive types, and you can do this in one go. This means you don’t have to add the drives one-by-one. All new drives in the set are automatically suffixed, making them easy to identify. If you want to, you can modify the suffix to suit your drive naming conventions. As part of the same process, you can assign drive access to your users.
Create a drive set:
- On DIVA Fusion's menu, click Drives.
- Click New Drive Set.
- In the Base Name field, type the name that you want to see on all three drives.
Note: You cannot use the characters < > : " / \ | ? *
- (Optional) Uncheck the Create Favourite checkbox if you don't want a favourite containing the new drives.
- Uncheck the drives that you don't want to create.
- Select the volume for each of your drives.
Note: If only one volume is available for the type, e.g. Avid Projects, it will be selected by default.
Note: Your drives don't all have to reside on the same volume. If you think the volume may have insufficient space for all the media files that will be created, select another volume.
- (Optional) Overtype each suffix with the suffix you want to see on the drive name.
Note: Each drive name will consist of the base name and a suffix.
- For each user account, select the relevant access options.
Tip: To apply the same setting to all users in the list, click the column title (click Denied, click Read or click Write).
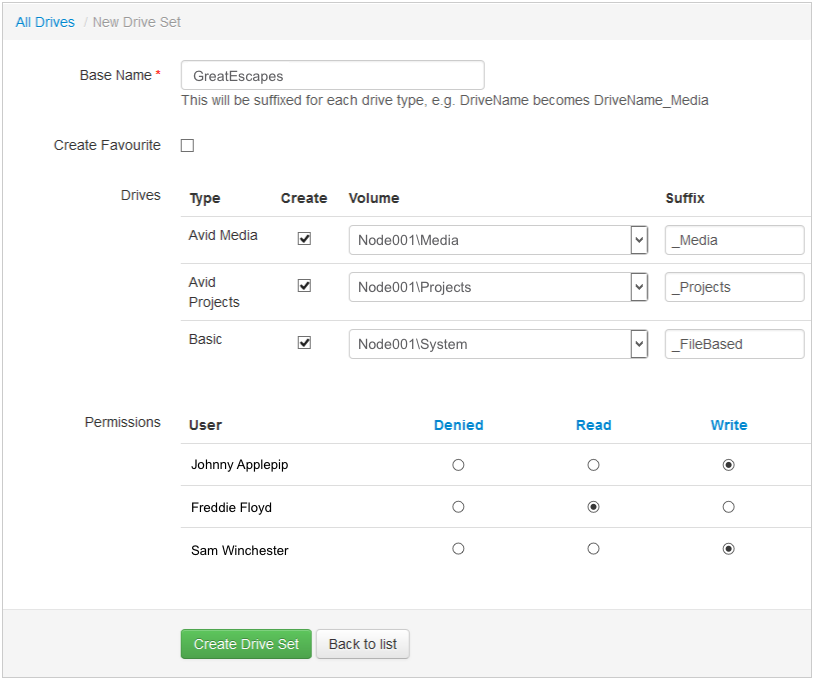
- Click Create Drive Set.
Result: The drive set is added to the volume(s) you selected and listed on the DIVA Drives page.